Utilizing Maya Arnold Ray Depth and Environment settings to achieve high quality visuals.
Ray Depth
Ray depth allows you to limit number of attempts that will identify rays presence for certain ray type. In math this is mostly known as a recursion method. Higher numbers will render more rays (if they exists), which is going to increase the render time.
Total – should represent sum of diffuse, transmission and specular rays. Setting total rays number lower than sum of those three, can implicate that some depth rays are left unrendered, if image happens to have all of them reaching maximum values.
Diffuse – Represents maximum number of diffusion ray depths that can occur in one image/frame. Similar as at Sampling settings, value of 0 will disable diffuse global illumination, while increasing it more bounced diffuse rays will be added to scene. This is highly noticeable in scenes where global lighting is reduced due the various obstacles (eg. interiors ).
Specular – Represents maximum number of specular rays that can be reflected per image. If it is 0, only the direct reflection (eg. sky hdr) will be visible, no bouncing reflections will be part of a rendered image.
Transmission – Represent maximum number of transmission rays that can be refracted per image. Minimal value to have refraction rays applied depends on how many surfaces those rays needs to break through. If there is a single refractive plain, then value of 1 should be enough to display the refractive rays. In a case of a sphere, or square, 2 should work. For a two sided sphere or square, 4 rays is enough, and so on …
Volume – Maximum number of volumetric rays.
Transparency depth – This number shows how many times rays could pass through the transparent surface. If value is set to 0, no transparency will be visible. When value of 4 is set for example, rays will pass through the 4 transparent surfaces.
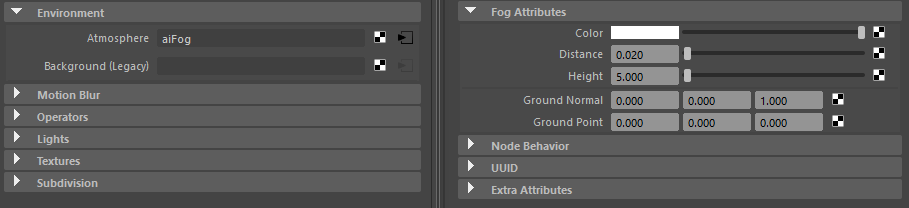
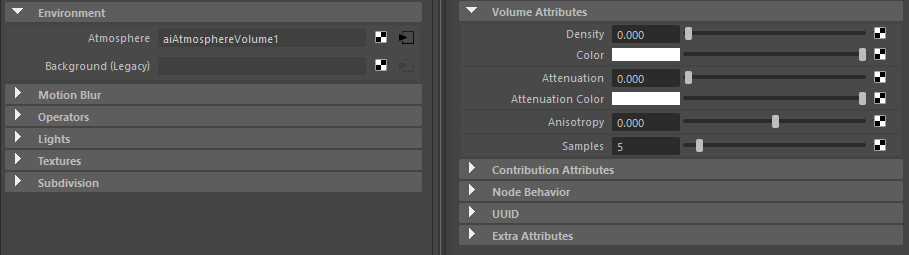
Environment
Environment is very important step in visualization process. Here you can add atmospheric and background options.
Atmospheric – this option will add volumetric effect on lights. There is two options on atmospheric section which are fog and atmosphere volume.
Fog will add diffussal light scattering effect that is affecting more distant objects to lose their contrast, or to “got lost in fog”. When fog node is created, you will be enabled to change some of its settings, like color, distance and height.
Atmosphere volume will add volumetric rays that are following light source, along with volumetric shadows. You can set options like volumetric density, color and samples.
Background – With this option you can add background to the scene, in a form of a global sphere that surrounds scene. If you want to gain only reflections, you can disable “primary visibility” from “Render stats”, and leave “Specular reflection” enabled.
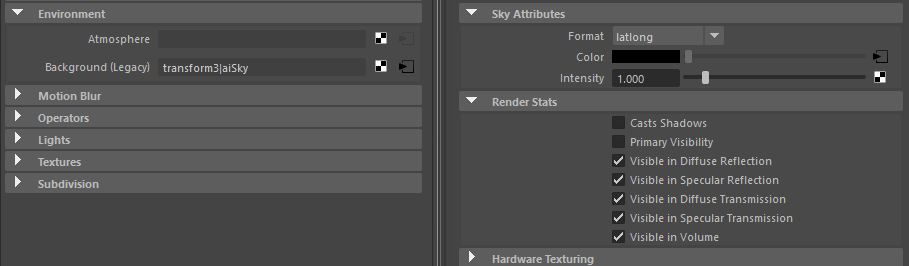
You can manipulate sphere rotation within 2D texture attributes.
Motion blur
By enabling it, you can gain motion blur on rendered images. Prerequisite is that you are actually rendering an image that has animation (motion keyframes) applied. Once you animate your scene, you can choose which parameters of motion blur you want to render. Available options are:
- Deformation – this will add motion blur on any shape changes on animated object.
- Camera – will add camera motion blur.
- Shaders – this will add a motion blur effect on any shader changes on object.
Shutter – with this option you can control shutter options on particular rendered frame. You can choose whether starting, ending or centered position on frame motion should be rendered.
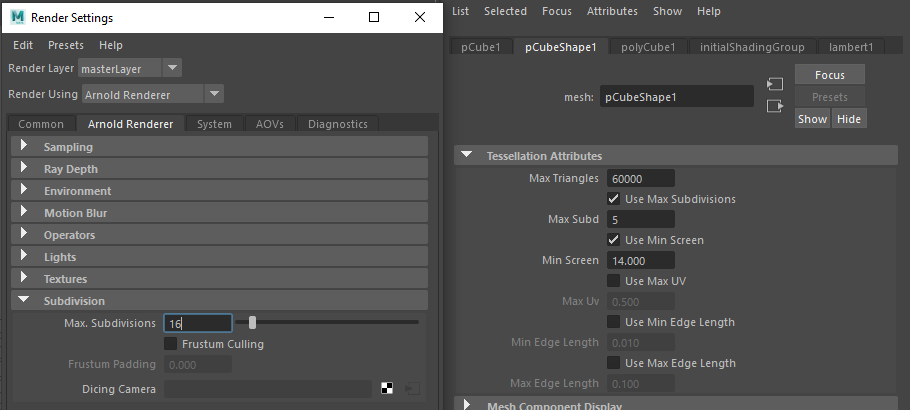
Subdivision
This option controls global tessellation on subdivision objects. Depending on how many “subdiv” objects you have in scene, and how detailed their geometry is, you can set values approximate as:
- 16 – If you have very low polygon detailed object.
- 8 – if your object contains medium polygon number.
- 4 – if your subdivision object are high polygonal.
There is also ability to set max subdivision for particular objects. This can help you to optimize scene and to save render time, as you can set global value to approximately satisfy majority of objects, and individual to match needed tessellation on particular objects.
Good practice is to use lower value for individual objects, from the one that is set as global. This is because Arnold renderer will take lower value as actual.