Use of After Effect expression controls for best 3d composition manipulation.
Expressions represents native After Effects effect, that can be connected with other layer effects, which gives them ability to group and expose various options within a single command.
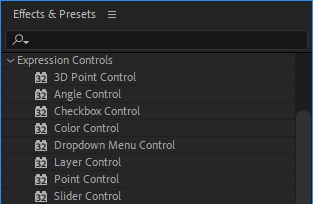
To add expression control, go to: Effects & Presets / Expression Controls. Here you can find various types of control’s:
- 3D Point Control
- Angle Control
- Checkbox Control
- Color Control
- Dropdown Menu Control
- Layer Control
- Point Control
- Slider Control
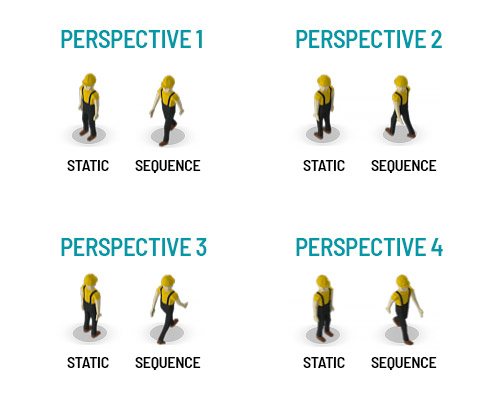
Based on your needs, you can use any of these controls to simplify manipulation of your composition. In our case, we are using Angle, Checkbox and Color Control expressions. We have rendered sequences of worker walking in four isometric perspectives, and put them into one composition.

There is total of eight layers for four perspectives, where each perspective contains one static image and one animated sequence in the PNG format.
Connect layer perspective effect with expression.
Layer effect is connected with expression through Javascript code. Good starting point is to locate the effect that you want to manipulate with, and to hold ALT key why clicking on the stop watch icon.
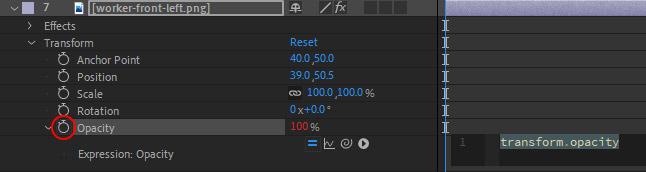
When you click on stop watch icon, you will notice that text input field appears on the right side instead keyframes. This is the are where we can write our code that connects dependencies with effect values. Initially, the effect is set as a written code, which can be a good learning point of how to write certain effects, that are basically presented as Javascript objects.
Before start coding, we want to add Angle Control at the composition root level. This expression will be dedicated for perspective change, regardless of it is animated or static image layer.
Below is piece of code that connects layer opacity with angle expression that is applied outside on main comp.
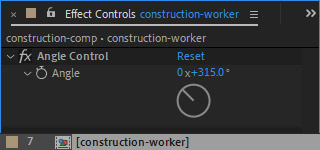
if (comp("construction-comp").layer(thisComp.name).effect("Angle Control")("Angle") >= 0 &&
    comp("construction-comp").layer(thisComp.name).effect("Angle Control")("Angle") < 90)
100 else 0
To reference correct layer with angle expression, we used name of the constant name of the composition, and the variable name of current composition where code is invoked.
- comp(“construction-comp”) – referencing the main composition.
- layer(thisComp.name) – referencing the current component name.
- effect(“Angle Control”)(“Angle”) – referencing the effect name (Angle Control), and inner effect value (Angle).
All together, these are representing path to the desired effect that we want to target, as a Javascript object. If the value of the wheel is set within the first quarter of radius, from 0 to 90 degrees, this layer will be fully visible with its opacity set to 100. When you set the wheel outside of this values, it will get hidden with its opacity set to 0.
Similarly, we have built visibility expression for other static image layers to close all four perspectives within the angle control wheel radius.
if (comp("construction-comp").layer(thisComp.name).effect("Angle Control")("Angle") >= 90 &&
    comp("construction-comp").layer(thisComp.name).effect("Angle Control")("Angle") < 180)
100 else 0

if (comp("construction-comp").layer(thisComp.name).effect("Angle Control")("Angle") >= 180 &&
    comp("construction-comp").layer(thisComp.name).effect("Angle Control")("Angle") < 270)
100 else 0

if (comp("construction-comp").layer(thisComp.name).effect("Angle Control")("Angle") >= 270 &&
    comp("construction-comp").layer(thisComp.name).effect("Angle Control")("Angle") < 360)
100 else 0
Enabling and disabling animation layer with the expression.
To enable and disable animation we are using Checkbox Control as a trigger, and we renamed it to “Animation” for more convenient purpose. It is added at same top composition level as Angle Control, so it can be referenced in code in a similar way.

Code snipped that we are adding into static versus animated image sequence is actually checking for boolean value of the checkbox.
When checkbox is disabled:
comp("construction-comp").layer(thisComp.name).effect("Animation")("Checkbox") == falseWhen checkbox is enabled:
comp("construction-comp").layer(thisComp.name).effect("Animation")("Checkbox") == trueHaving this connection established we can finish snippets for static and animated image sequence.
Static:
if (comp("construction-comp").layer(thisComp.name).effect("Angle Control")("Angle") >= 0 &&
    comp("construction-comp").layer(thisComp.name).effect("Angle Control")("Angle") < 90 &&
    comp("construction-comp").layer(thisComp.name).effect("Animation")("Checkbox") == false)
100 else 0
Animated:
if (comp("construction-comp").layer(thisComp.name).effect("Angle Control")("Angle") >= 90 &&
    comp("construction-comp").layer(thisComp.name).effect("Angle Control")("Angle") < 180 &&
    comp("construction-comp").layer(thisComp.name).effect("Animation")("Checkbox") == true)
100 else 0
With this expressions set on appropriate layers, we are able to manipulate both perspective and animation properties.
With this expressions set on appropriate layers, we are able to manipulate both perspective and animation properties.
If you want to duplicate layers in order to add more elements with independent controls, got to project tree, select composition and press “ctrl+d“. After that, you should copy and paste Angle Control and Animation expression effects to newly duplicated composition. Inner expression code should adapt automatically. In a case that code is not applied, go to File / Project Settings / Expressions / Expression Engine, and check if the “Legacy ExtendScript” is selected. If that doesn’t fix the script, just restarting AE should be enough. As a last resort, you can just click inside and outside the script that has warning sign.
Setting the Color Expression to control multiple color sources.
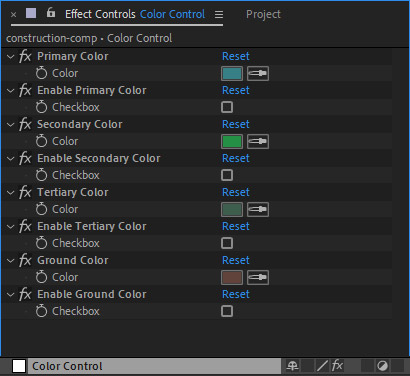
In order to be able to control entire composition color scheme, we have grouped objects into four color groups, and place them to be available on single layer named “Color Control”. On this layer we have set four Color Control, and four Checkbox Control expression effects.
Color Control is used to edit hue and saturation of connected color group, and Checkboxes are used to enable and disable that color effect. Disabling color change is important, since it is only way to restore native rendered color scheme.
These four groups are:
- Primary Color
- Secondary Color
- Tertiary Color
- Ground Color
The effect that is tied to this expression is “Change To Color”, and it is applied to every layer with corresponding expression written in code.
The effect that is tied to this expression is “Change To Color”, and it is applied to every layer with corresponding expression written in code. “To” property is attached to Color Control picker, and “Effect Opacity” is attached to Checkbox Control.
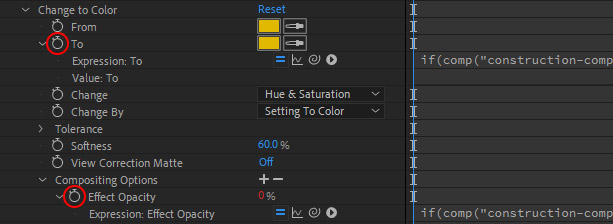
Expression for “To” property on Chane To Color effect.
if(comp("construction-comp").layer("Color Control").effect("Enable Primary Color")("Checkbox") == true)
   comp("construction-comp").layer("Color Control").effect(Primary Color)("Color")
else
   effect("Change to Color")(1)
Here, we are telling that once “Enable Primary Color” checkbox is selected, to pickup whatever color is selected within the “Primary Color” picker. “Else” statement does not makes any visual impact, as if the checkbox is disabled, it will set effect opacity to 0, which is presented on the code below.
Expression for “To” property on Chane To Color effect.
if(comp("construction-comp").layer("Color Control").effect("Enable Primary Color")("Checkbox") == true)
   effect("Change to Color").compositingOption.effectOpacity = 100
else
   effect("Change to Color").compositingOption.effectOpacity = 0
This code is making sure that if the checkbox is disabled, no color corrections are taking the effect, so that native rendered color scheme is preserved.
Preview of Color Control expression in the composition.