Basic Arnold Maya Sampling Settings to achieve high quality visuals.
Arnold is rendering engine that comes by default maya’s installation since 2017 version. If in any case is not available, it can be enabled by checking the “mtoa.mll” in plugin manager.
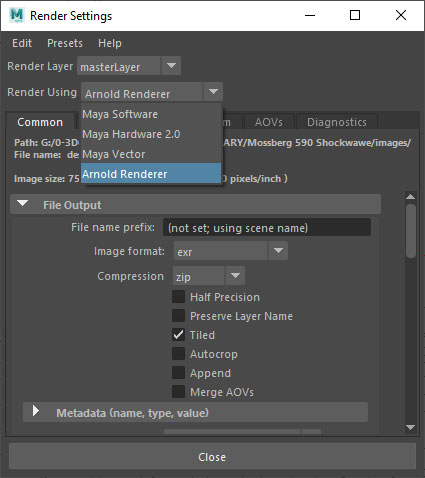
To start, choose “Arnold rendered” from “Render Using” dropdown that is available just at the start of Render settings window.
Right after you can apply basics settings that are common for all render engines, within the “Common” tab. Here you can set properties like, image format, animation frame range, camera view to render and image dimensions.
Sampling
Sampling options are simply related to image quality. By increasing it you will reduce noise, but also increase render time, so setting the optimal values is essential to scale visualization process within reasonable timeframes.
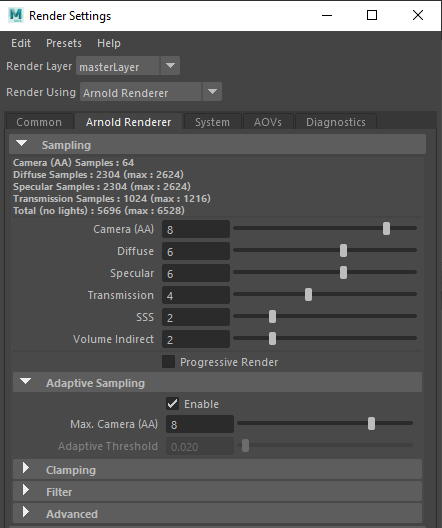
Camer (AA) – Higher number of samples will result the better anti-aliasing effect. Value of 4 can be represented as square value for single pixes, 4×4=16 rays per pixes, with can be considered as a value needed to gain medium quality image. For higher quality images larger values are required (8 – 16).
Camera samples is the most important value because it multiplies all other sample settings.
For example it multiplies diffuse samples as: 8*8+6*6=2304. All calculations are displayed above the sliders.
Diffuse samples – represent number of global illuminations rays that are involved in forming of diffusion color. If it is set to 0, only direct lighting will be visible, while if you increase samples number, more diffuse color that are product of global illumination. Higher number will generate higher image quality, or less noise to diffusion color. Sample value of 6 will render better image quality.
Specular samples – by increasing this number, you will reduce noise that occurs on reflective surfaces. Values higher than 4 will render higher quality reflections.
Transmission samples – are responsible for quality of surfaces that transmit the light, like glass. Higher values will reduce noise in the transmission. If needed you can “debug” the noise appearance by setting transition samples to 0. If noise persist, than is most likely the case that lack of specular samples are producing noise. Values larger than 6 should provide high quality transmissions. Very often the sections where transmission samples are applied, are require more of rendering time than diffuse or specular surfaces.
SSS samples – sub-surface scattering are often used for materials such as skin, wax, milk … By increasing this samples, you will reduce noise on light that penetrates through the SSS material.
Volume indirect samples – This samples are responsible for quality on the surfaces that are covered with indirect lighting. For this to be applied, you also have to enable some light options, like “cast volumetric shadow”.
Also, if you want to increase quality of atmosphere volume, you would have to set its options at: Render → Render settings → Environment → Atmosphere → Volume Attributes

Adaptive sampling
Adaptive sampling provide us with capability to enable dynamic calculations of Camera Antialiasing samples. When enabled, setting the Max. Camera (AA) above the current average value, will tell the render engine to dedicate more resources for surfaces that requires more noise reduction. This will of course increase the render time, but if you carefully manipulate with Camera (AA) values from both Sampling and Adaptive Sampling options, you can gain better image quality for less or same render time.
Consider Sampling Camera (AA) as a value that is needed to satisfy majority of image quality that you have to render. After that you can increase Max. Camera (AA) value, which will polish additional noise on image.
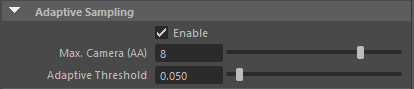
Adaptive threshold – this value represents the trigger value for adapting camera antialiasing. Lower number will make anti-aliasing filters more sensitive to noise, and also it will increase the render time.